
Table of Contents
- Safety Checks Before You Jump Start a Car
- Jumper Cable Connection Order: The Right Sequence
- Step-by-Step: How to Jump Start Your Vehicle
- How Long to Leave Jumper Cables Connected
- How to Jump-Start a Car With a Portable Jump Starter
- Common Jump-Starting Mistakes to Avoid
- What to Do After Your Engine Starts
- When to Call for Professional Roadside Assistance
- Frequently Asked Questions
Last Updated: October 6, 2026
Safety Checks Before You Jump Start a Car
Before you jump start a car safely, you need to verify that both vehicles are safe to work with by connecting cables or using a portable jump starter. A dead battery is fixable. Damage from improper jump-starting can be expensive and dangerous.
Start by checking the battery itself. Look for cracks, leaks, or corrosion around the terminals. If the battery case is damaged or leaking fluid, do not attempt a jump start. Call for professional roadside assistance instead.
Next, confirm both vehicles are in park (or neutral for manual transmissions) with the engines off. Turn off all electrical systems: headlights, radio, climate control, and interior lights. This reduces the current draw and protects sensitive electronics during the jump-start process.
Check that both cars are parked safely away from traffic. If you’re on a freeway shoulder, turn on your hazard lights and keep distance from moving vehicles.
For modern vehicles, electric vehicles, or hybrids, consult the owner’s manual before attempting any jump start. Some vehicles have special procedures or require professional service for a dead battery. When in doubt, call for help rather than risk damage to expensive electrical systems.
Never jump start a battery that is visibly cracked, leaking, or swollen. Damaged batteries can overheat or explode during the charging process. Professional roadside assistance is your safest option.
Jumper Cable Connection Order: The Right Sequence
The order in which you connect jumper cables matters. Connecting them incorrectly can damage both vehicles’ electrical systems or create a safety hazard.
Always follow this sequence:
-
Connect the positive (red) cable to the dead battery‘s positive terminal first. This is the + terminal on the battery. The positive terminal is typically larger and may have a red plastic cover.
-
Connect the other end of the red cable to the positive terminal of the good battery. Again, this is the + terminal.
-
Connect the black (negative) cable to the negative terminal of the good battery. This is the − terminal on the working battery.
-
Connect the final black cable end to an unpainted metal surface on the engine block of the dead car. Do not connect it to the negative terminal of the dead battery. Instead, attach it to bare metal, a bolt, bracket, or engine component. This is called a ground connection and reduces the risk of sparks near the battery.
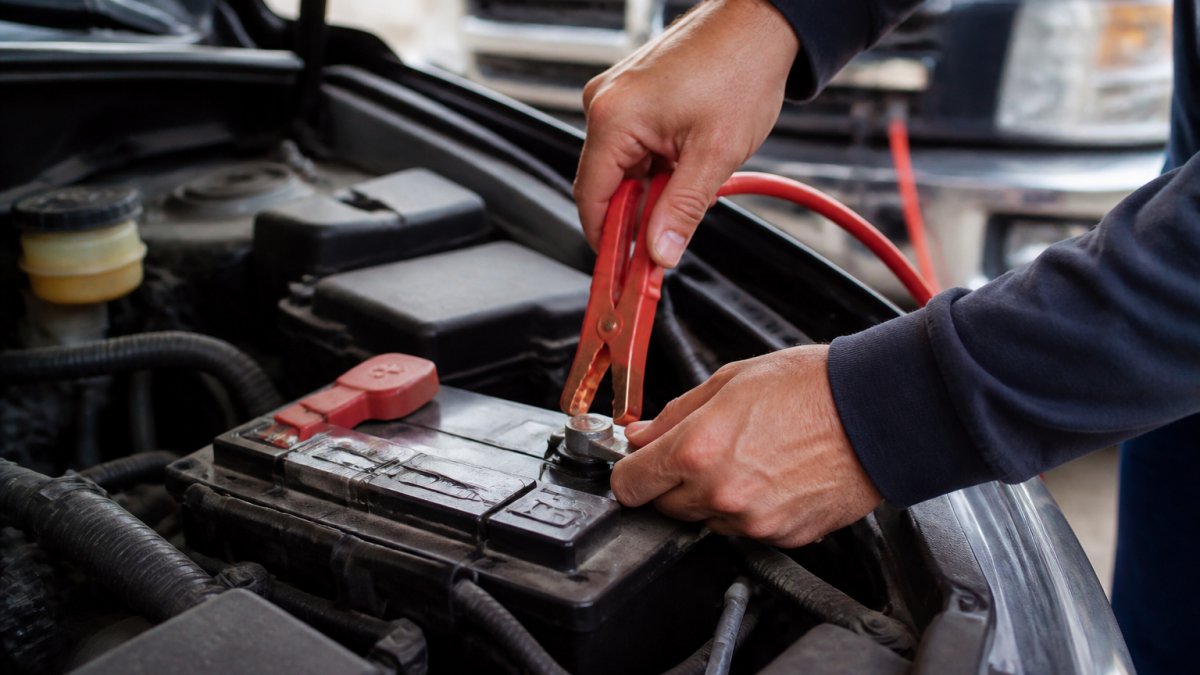
This sequence matters because it prevents sparks from occurring near the battery, where hydrogen gas may be present. A spark near a battery can ignite that gas and cause an explosion.
When disconnecting, reverse the order: remove the black cable from the engine ground first, then from the good battery. Remove the red cable from the good battery, then from the dead battery last. This reverse sequence prevents electrical surges that could damage computers in modern vehicles.
Always connect to an unpainted metal surface on the engine block of the dead car, not the negative terminal itself. This ground connection is safer and works just as well for completing the circuit.
Step-by-Step: How to Jump Start Your Vehicle
Positioning Both Vehicles
Position the vehicles so the batteries are as close as possible without the cars touching. The working vehicle should be parked parallel to the disabled car, close enough that a standard set of jumper cables (which are typically 10-12 feet long) can reach both batteries comfortably.
If you’re using a portable jump starter instead of another vehicle, position it near the dead battery so the starter’s cables can reach both terminals. Make sure the engine of the working vehicle is off before you begin.
Turn on the hazard lights of both vehicles. If you’re on a freeway or busy road, stay alert to traffic and consider calling for professional roadside assistance if you feel unsafe working near moving vehicles.
Connecting and Starting
Attach the jumper cables in the correct order as described above: positive to positive, positive to good battery, negative to good battery, then black cable to an unpainted metal surface on the engine block of the dead car. Ensure all connections are tight and secure.
Start the working vehicle and let it run for 2-3 minutes. This allows the dead battery to begin charging. You should see the engine running smoothly without stalling.
Now start the vehicle with the dead battery. Turn the key or press the start button as you normally would. The engine should turn over and start. If it doesn’t start after 30 seconds of cranking, stop and wait another 2-3 minutes before trying again. Continuous cranking drains the good battery and can damage the starter motor.
Once the disabled vehicle starts, let both engines run for a few minutes. This allows the alternator in the working car to charge the dead battery further.
How Long to Leave Jumper Cables Connected
Leave the jumper cables connected for at least 3-5 minutes after the disabled vehicle’s engine starts. This gives the dead battery enough time to accept a charge and allows the alternator to begin recharging it.
Do not disconnect the cables immediately after starting. The battery needs time to stabilize and accept charge from the alternator. If you disconnect too quickly, the vehicle may stall when you try to drive.
After 5 minutes, carefully disconnect the cables in reverse order: black cable from the engine ground first, black cable from the good battery, red cable from the good battery, and finally red cable from the previously dead battery. Work slowly and deliberately to avoid creating sparks.
After disconnecting, keep the previously disabled vehicle running for at least 20 minutes. The alternator needs this time to recharge the battery. If the vehicle stalls during this period, the battery may not have recovered enough to keep the engine running on its own.
How to Jump-Start a Car With a Portable Jump Starter
A portable jump starter is a battery pack that stores electrical charge and can start a vehicle without needing another car. These devices are convenient if you’re stranded alone or if you don’t have a second vehicle nearby.
Portable jump starters come in various sizes. Small models are compact and fit in a glove compartment. Larger models deliver more starting power and work on bigger engines like trucks or SUVs.
To use a portable jump starter, first ensure it is fully charged. Most modern jump starters have an LED display showing battery level.
Some portable jump starters have a power button you press before starting the vehicle. Others activate automatically when you connect the clamps. Refer to your device’s manual for specific instructions.
Once connected, turn the key or press the start button to start the vehicle. The process is identical to using jumper cables. Let the engine run for 20 minutes after starting to allow the alternator to recharge the battery.
Portable jump starters work best when they’re fully charged and stored in your vehicle. A dead jump starter won’t help you in an emergency, so check the charge level monthly.
Common Jump-Starting Mistakes to Avoid
Connecting cables in the wrong order is the most frequent mistake. Many people connect the black cable directly to the negative terminal of the dead battery instead of using a ground connection.
Attempting to jump start a visibly damaged battery puts you at risk. If the battery case is cracked, swollen, or leaking, do not proceed.
Starting the disabled vehicle immediately without letting the good battery charge it first drains the good battery and may not provide enough power to start the engine.
Forgetting to turn off electrical systems in both vehicles wastes power and can damage sensitive electronics. Turn off headlights, radio, air conditioning, and all interior lights before connecting cables.
Disconnecting cables too quickly after the engine starts causes the vehicle to stall. Keep cables connected for at least 5 minutes to allow the battery to stabilize.
Not running the disabled vehicle long enough after starting leaves the battery too weak to run on its own.
Using damaged or frayed jumper cables creates a fire hazard and reduces electrical contact. Inspect cables before use and replace them if insulation is damaged or clamps are corroded.
What to Do After Your Engine Starts
Once the disabled vehicle starts and is running smoothly, keep both engines running for several minutes. This allows the alternator in the working vehicle to transfer charge to the previously dead battery.
After 5 minutes, carefully disconnect the jumper cables in reverse order. Remove the black cable from the engine ground of the disabled vehicle first, then from the good battery.
Do not turn off the engine of the previously disabled vehicle. Keep it running for at least 20 minutes. This gives the alternator time to recharge the battery enough to keep the engine running on its own.
If the vehicle stalls during this period, the battery may not have recovered. In this case, the battery likely needs professional service or replacement. Contact roadside assistance for support.
After 20 minutes of running, drive the vehicle normally. Avoid stopping the engine for at least an hour. Continuous driving allows the alternator to deliver maximum charge to the battery.
If the vehicle fails to start the next day or the day after, the battery is likely defective and needs replacement. A healthy battery should hold a charge overnight after being jump-started.
If the vehicle stalls repeatedly after a jump start, or if it fails to start the next time you use it, the battery is likely damaged and needs professional replacement. Do not attempt multiple jump starts on a failing battery.
When to Call for Professional Roadside Assistance
Some situations require professional help instead of a DIY jump start. If the battery case is cracked, leaking, or visibly swollen, do not attempt a jump start. Call for roadside assistance immediately.
If you’re on a busy freeway or in heavy traffic, attempting a jump start puts you at risk.
If the vehicle has a hybrid or electric drivetrain, consult the owner’s manual or call for professional help. These vehicles have complex electrical systems that can be damaged by improper jump-starting procedures.
If you don’t have jumper cables, a portable jump starter, or access to another vehicle, professional roadside assistance is your only option.
If the vehicle fails to start after a jump start, or if it stalls repeatedly, the battery is likely damaged beyond recovery. At this point, towing to a repair shop is necessary.
If you’re stranded in an unsafe location, on a freeway shoulder, or in bad weather, professional assistance is always the better choice.
To jump start a car safely requires proper technique, correct cable connections, and good judgment about when to call for professional help.
Frequently Asked Questions
What is the correct procedure to jump start a car?
Position both vehicles within cable reach, turn off both engines, connect the red cable to the dead battery’s positive terminal, then the good battery’s positive terminal. Connect the black cable to the good battery’s negative terminal, then to an unpainted metal surface on the dead car’s engine. Start the good car, wait 2-3 minutes, then start your vehicle. Reverse the cable order when disconnecting. Always wear safety glasses and check battery condition before attempting.
Can I jump-start a car by myself without another vehicle?
Yes, you can use a portable jump starter instead of another car. These battery-powered devices connect directly to your dead battery terminals in the same order as jumper cables: positive terminal first, then negative. Portable jump starters are convenient for solo drivers and work on most passenger cars, vans, and motorcycles. Keep one in your vehicle for emergencies.
What are common mistakes when jump-starting a car?
Common errors include connecting cables in the wrong order, touching metal between terminals, leaving the engine running on the donor vehicle too long, and attempting a jump start on a cracked or leaking battery. Never jump-start a vehicle if the battery is visibly damaged. Avoid wearing loose clothing that could catch on moving engine parts, and always remove metal jewelry before working near battery terminals.
When should I stop trying to jump-start a car and call for professional help?
Stop after 3-4 jump-start attempts if the engine won’t turn over. If the battery is cracked, leaking, or more than 5 years old, call for roadside assistance instead of risking damage. Also call if you’re on a freeway shoulder in heavy traffic, uncomfortable working near the battery, or if warning lights indicate electrical or starter problems. Professional roadside assistance ensures your safety and vehicle protection.